Knit Hand Knit Beany Hat
Explore the Cozy World of Beany Hand Knit Hats
As the seasons change and the chill in the air becomes undeniable, there’s nothing quite like the warmth and comfort of a hand-knit beany hat. Not only do these knitted accessories keep you warm, but they also add a stylish touch to any outfit. In this blog post, we’ll delve into the art of beany hand hat knit, offering tips, techniques, and inspiration for your next knitting project.
What is a Beany Hand Knit Hat?
A beany hand knit hat, often referred to simply as a beanie, is a snug, oftentimes stretchy cap that covers the head and ears. Handmade with love, these hats come in various styles, colors, and patterns, showcasing the creator's unique touch. Whether you’re a beginner or an experienced knitter, crafting your own beany can be a rewarding experience.
The Benefits of Knitting Your Own Beany Hat
- Personalization: Customize your beany with colors and patterns that reflect your personality.
- Warmth: Hand-knit hats provide superior insulation compared to store-bought alternatives.
- Satisfaction: There's immense joy in wearing a piece you’ve created with your own hands.
- Eco-Friendly: Knitting at home reduces the need for mass-produced items, supporting sustainable fashion.
Essential Tools for Knitting a Beany Hat
Before you start your beany hand knit hat project, gather the following essential tools:
1. Knitting Needles
Choose the right size needles based on your yarn thickness. Circular needles are often preferred for their versatility.
2. Yarn
Select a soft, warm yarn. Wool, alpaca, or acrylic blends are popular choices that offer comfort and warmth.
3. Measuring Tape
Accurate measurements ensure your beany fits perfectly.
4. Stitch Markers
Use stitch markers to keep track of your pattern and stitches as you knit.
5. Scissors and Yarn Needle
These tools are essential for finishing your project and securing loose ends.
Basic Knitting Techniques for a Beany Hat
Creating a beany hat involves a few fundamental knitting techniques:
Cast On
Begin by casting on your desired number of stitches. The standard method is the long-tail cast-on, which provides a neat edge.
Knit Stitch
Most beanie patterns use the knit stitch, which forms a beautiful texture. Practice this stitch until you feel comfortable.
Decreasing
To shape the top of your beany, you'll need to decrease stitches. Follow your pattern for guidance on when and how to decrease.
Choosing the Right Pattern
When selecting a pattern for your beany hand knit hat, consider the following:
- Skill Level: Choose a pattern that matches your knitting skills, whether you’re a beginner or an advanced knitter.
- Style Preference: Decide whether you want a simple, classic beanie or a more elaborate design with cables or colorwork.
- Yarn Recommendations: Patterns often suggest specific types of yarn, which can affect the final look and feel of your hat.
Final Touches and Care for Your Beany Hat
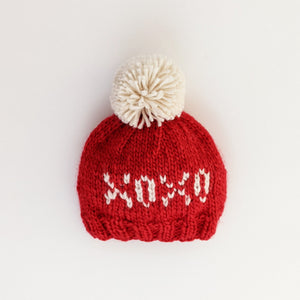
Once you’ve completed your beany hat, weave in any loose ends and consider adding embellishments like pom-poms or embroidery for a personal touch. To care for your hat, hand wash it in cold water and lay it flat to dry to maintain its shape and softness.
Join the Knitting Community
Knitters of all skill levels can benefit from joining knitting groups or online forums. Share your progress, seek advice, and find inspiration for new projects. Knitting is more than just a hobby; it’s a community where creativity and camaraderie flourish.
In conclusion, making your own beany hand knit hat is a fulfilling endeavor that allows you to express your creativity while keeping warm. So gather your tools, choose a pattern, and start knitting! You may just find your new favorite accessory.